First light...sorta
Last night was my first night to setup the Mach1 and Tak FSQ 85 for an imaging run. The clear sky clock looked wonderful and the skies were pristine during the evening. I setup in the backyard since I was hoping to have two straight nights of imaging and wanted to work out the kinks in the new gear. Setup went very smoothly and the equipment worked flawlessly. Unfortunately, a persistent puffy partly cloudy sky never relinquished. So no images were taken, but the gear checked out nicely. I was able to do a lot; monitored the drives performance via the autoguider, perform calibration for autoguiding, refined technique for using the laptop for focus with and without an h-alpha filter in place in the camera, and tested all of the new USB cords and hubs in use. So it was a successful night and I am ready to tonight! Clear skies!
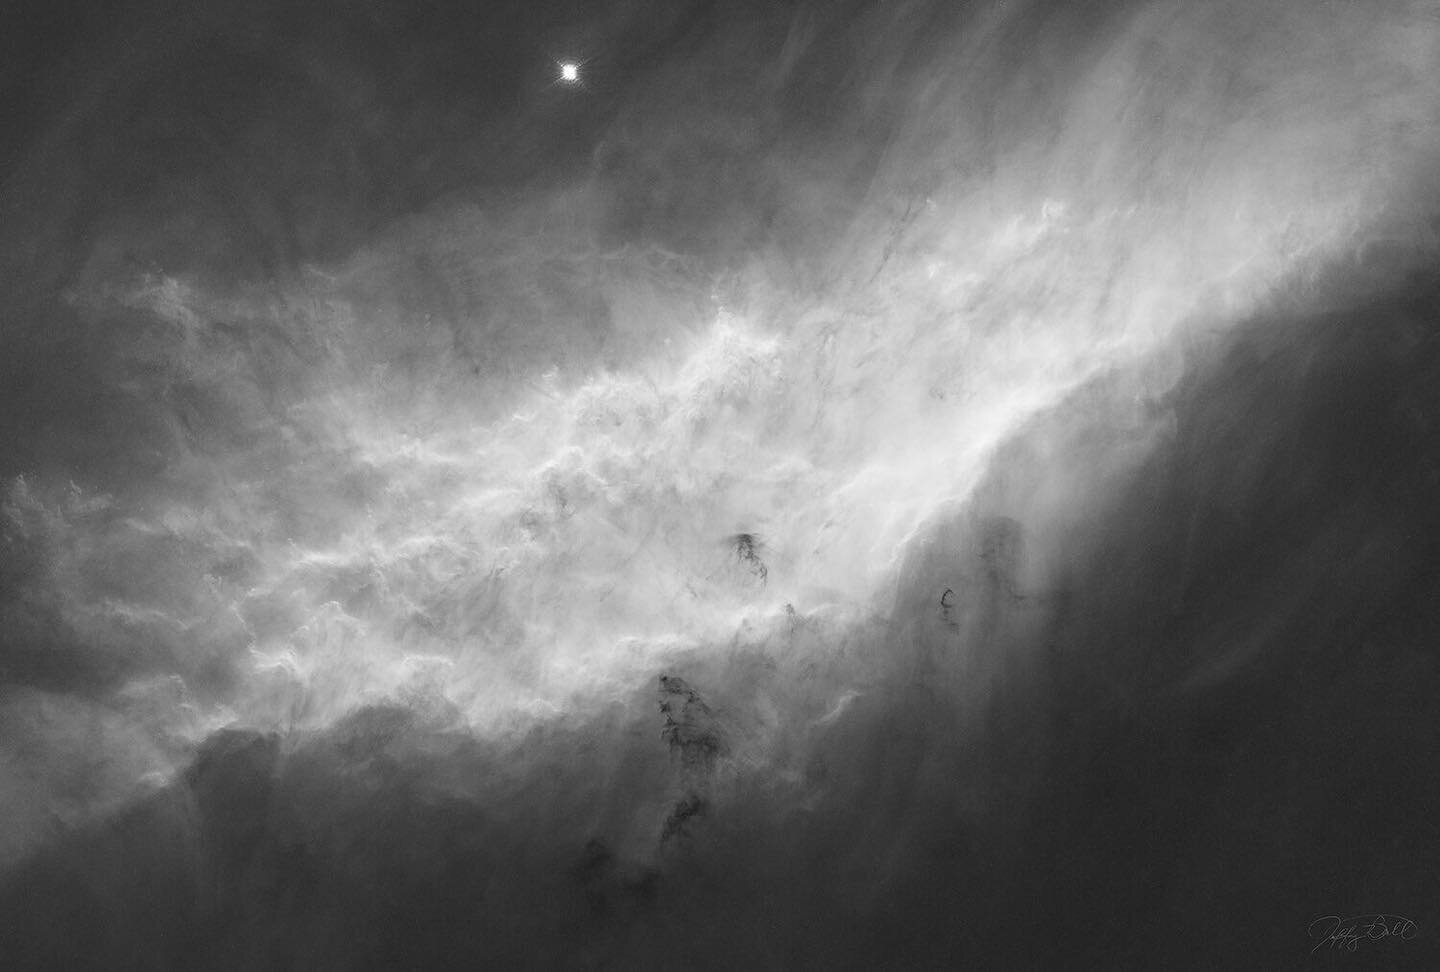
Horsehead: A refinement in processing

With some time to process, I have dug into the Horsehead and astronomical workflow to find the best approach. My main efforts are built around noise reduction and determining at what point to apply noise reduction software. The choices are to apply in RAW conversion in LR or to wait and use a PS plugin or 3rd party independent software. I have previously used Noise Ninja after the image is nearly complete, but was recently introduced to Noiseware. I am using the Pro version of Noiseware as a PS plugin. The main advantage to Noiseware is that I can use it in my normal workflow within PS and can use color profiles effectively. Noise Ninja did not work well with color profiles as an independent app. Noiseware has numerous controls, too numerous to mention here, for controlling how and where the noise reduction is to be applied. My thoughts are that it might be best to add some noise reduction in the RAW file in LR and then utilize Noiseware late in the processing stage. This particular image had no noise reduction applied in LR. I am going to rework the Horsehead image with that approach and will report back with results. One thing I love about astronomical photographs is that they are so difficult to work with that it makes landscape optimization so much easier. Take care and check out Noiseware if you get a chance on some really noisy images.
One other change in workflow with this image involved applying a flat field from the RAW camera files to the image in PS. This worked very well and is now a part of my workflow. I found no advantage to applying dark frames to the image. I believe dark frames are largely a waste with the Canon 450D and that simply increasing the amount of signal is the best way to maximize the signal to noise ratio.
Comet Lulin video
Comet Lulin graced North American skies in the winter of 2009. Fortunately, the closest approach was during the Winter Star Party in February. Comet Lulin proved to be much more interesting than I had previously been inclined to believe. The comet brightened dramatically over the week of February 24 and sported a beautiful ion blue tail. I slewed to the comet with the scope and began my initial exposures and was surprised by the views on the LCD screen. The blue ion tail was crumpled and extending away from the comet nucleus in a beautiful fashion. So this object became the main target object during the 2-4 a.m. imaging window on most nights.
This video is a time-lapse sequence of 9 3.5 minute exposures taken on February 21, 2009 from the Winter Star Party in the Florida Keys. Each image was optimized in Adobe Light Room and the video was compiled with Windows Movie Maker. The video loops several times so that the viewer can pick up the subtle changes in the blue ion tail. Geostationary satellites are common in this area of sky and pass through the field as through they were moving airplanes, but in fact it is the telescope and camera moving to compensate for the Earth's rotation.
Comet Lulin

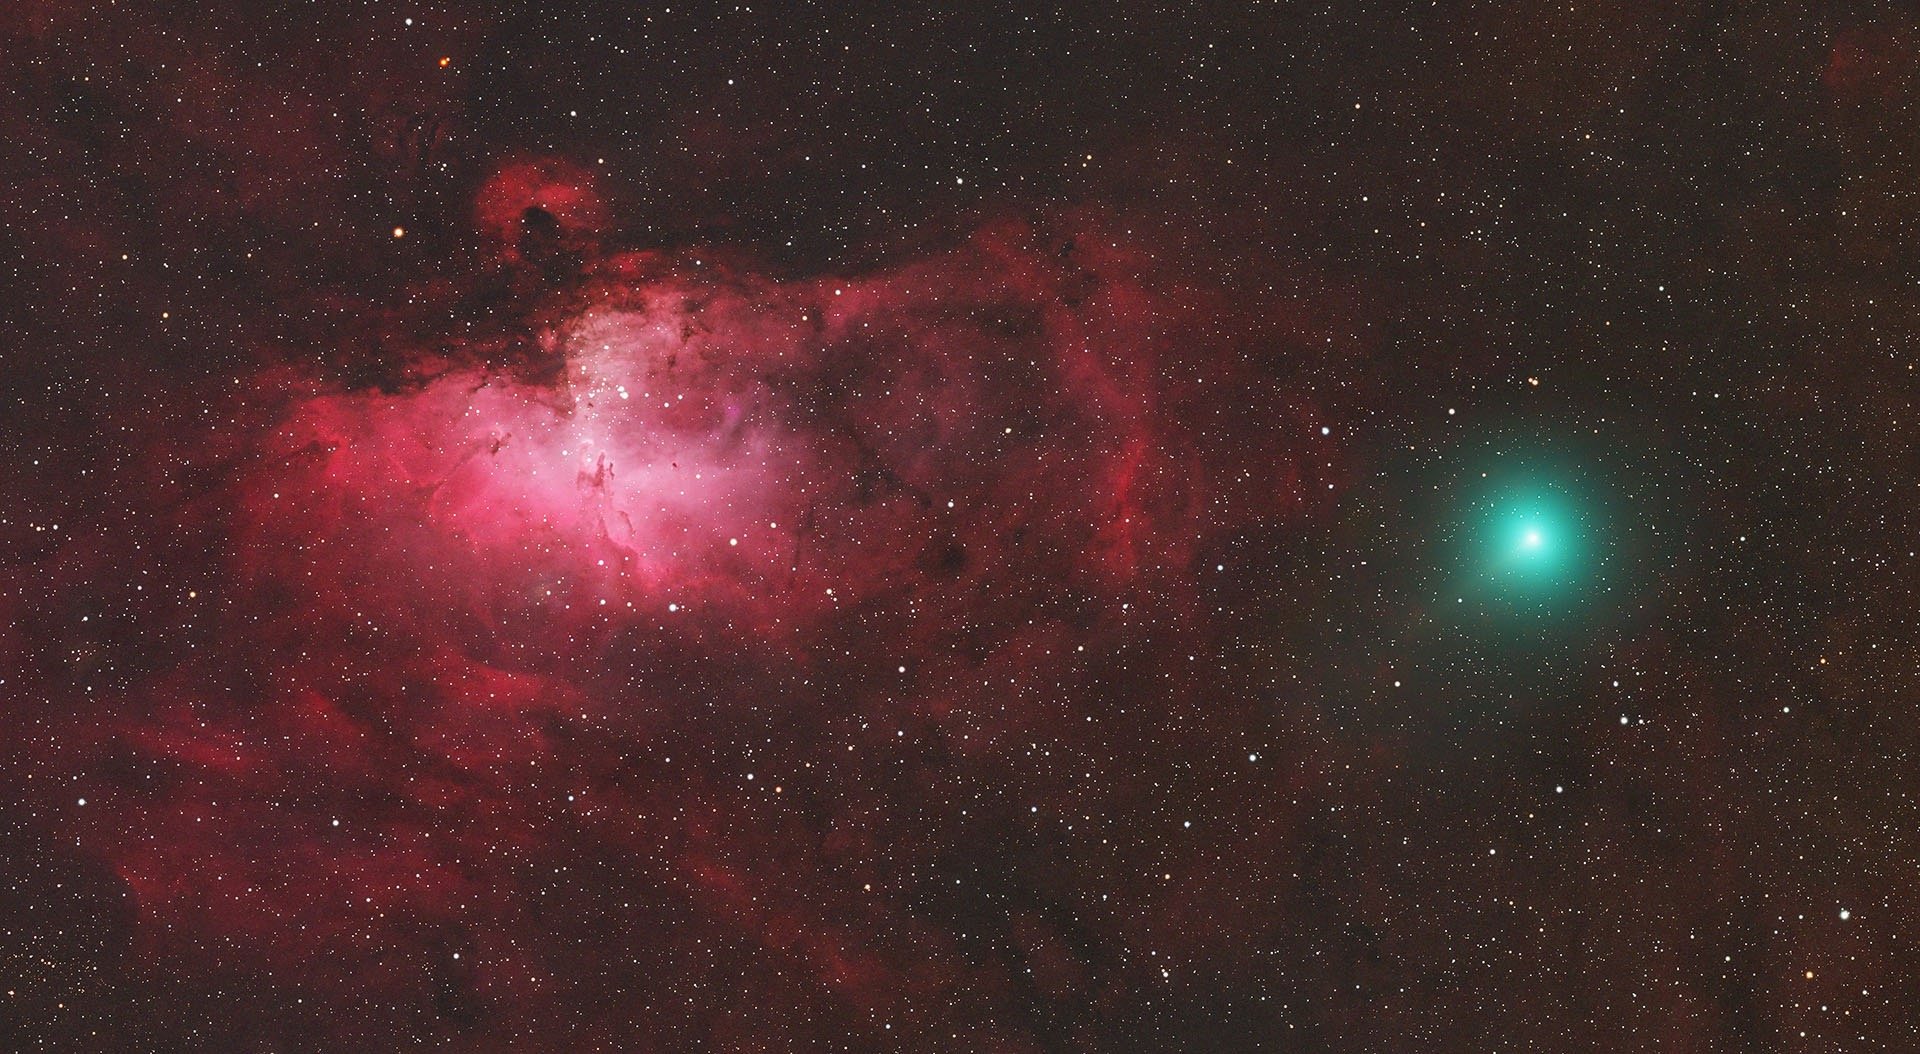
Comet Lulin graced North American skies in the winter of 2009. Fortunately, the closest approach was during the Winter Star Party in February. Comet Lulin proved to be much more interesting than I had previously been inclined to believe. The comet brightened dramatically over the week of February 24 and sported a beautiful ion blue tail. I slewed to the comet with the scope and began my initial exposures and was surprised by the views on the LCD screen. The blue ion tail was crumpled and extending away from the comet nucleus in a beautiful fashion. So this object became the main target object during the 2-4 a.m. imaging window on most nights. More information on the comet can be found by clicking on the title of the blog at NASA's website. You may also click on the image for a larger presentation.
This particular image was taken during the 2 a.m. hour of February 21, 2009. It is a composite of 9 exposures of 3.5 minutes each at ISO 1600 on the Canon 450D through the TMB 92SS refractor. Comet imaging poses additional challenges when the comet is fast moving such as Comet Lulin. The imager must combine several short exposures for the background sky as well as for the comet. So two iterations of stacking are needed since the comet is moving relative to the fixed star field. This is quite challenging in processing, but we do have techniques that allow us to accomplish this with nice results.
All of the processing was accomplished with Adobe Light Room 2.0 and PS3 with some Noise Ninja for noise reduction. Images were aligned and stacked with Images Plus. A Sigma median combine was used on the comet nucleus to achieve a reduction in star trails and isolate the comet nucleus and tail in the combination. The total exposure time is approximately 30 minutes. I am also going to present a movie which depicts the comet moving relative to the star field. I hope you enjoy the image and please check out the NASA link for more information on the comet.
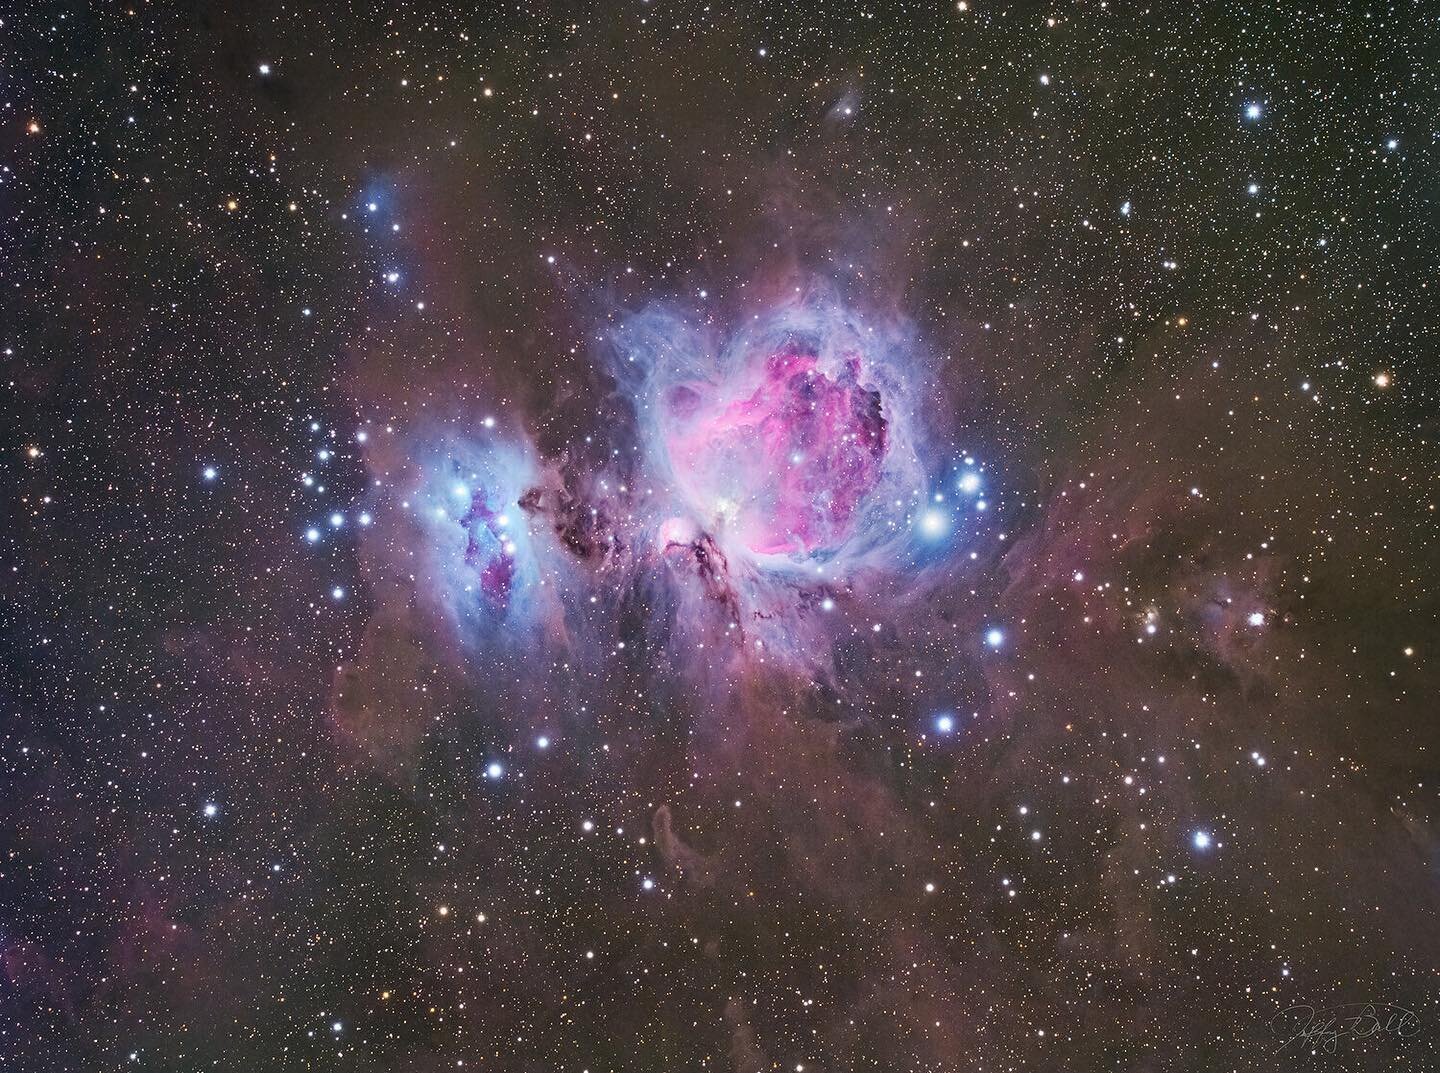
An Orion experiment

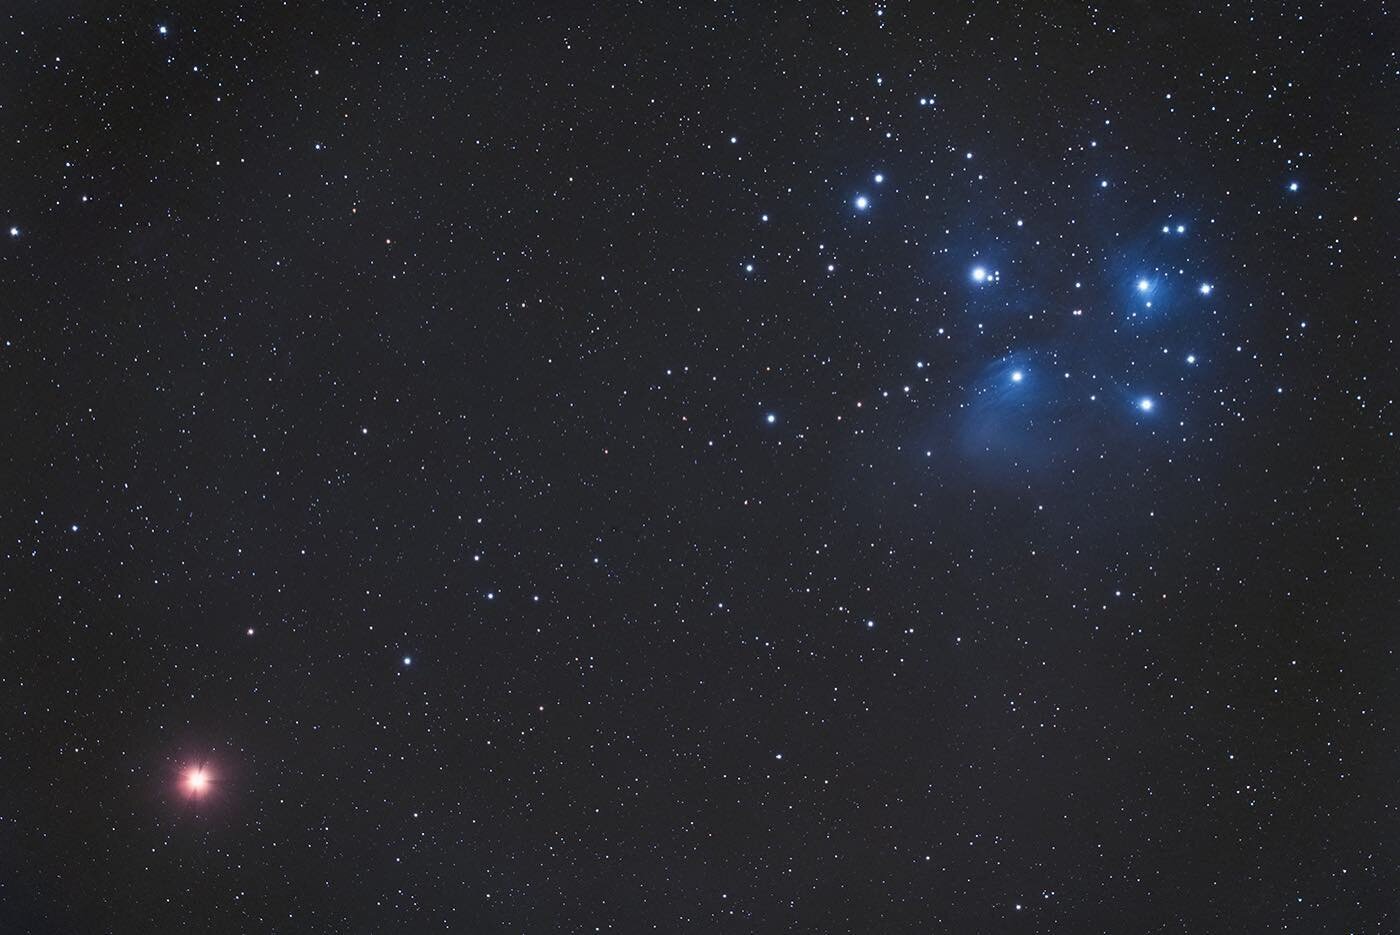
Now this is simply crazy. I had some Orion Nebula data from WSP that I basically captured on a whim. So in reviewing the data in Light Room I wanted to see just what the new techniques could bring out of this data. Let me state up front that this is simply not enough data to get what I eventually want out of this image. But, it is a great exercise in seeing exactly what the technique can do with very limited amounts of data. I selected 11 of the best frames captured on the Canon 450D and TMB 92SS combination. I optimized each image in LR 2.2 and exported to tiff. I used Images Plus and Sigma clip for the alignment and combination and then processed as normal in PS3. Now one other major error on my part, not that the clouds at WSP had anything to do with it, was that I failed to capture shorter exposures to compensate for the over-exposed core of M42. So I did plug in some old data from other instruments for the core of M42 in this image. There is a fair amount of noise reduction via Noise Ninja applied to the shadow areas. So for only 40 minutes of data with a lowly DSLR, I am very happy with the potential to really capture the Orion Nebula area as I hope next year. My expectations are that two hours of data at ISO 800 will be wonderful data to work with and accomplish my imaging goals. Please drop me a line if you have any questions or comments and I hope you enjoy the image.
The Herschel 400 Astronomical League Project is underway
It’s not too late to join. We are about 30 objects into the Herschel 400. Hope to get another session in soon. Please subscribe to the YouTube channel so you get notifications on LIVE STREAMS.
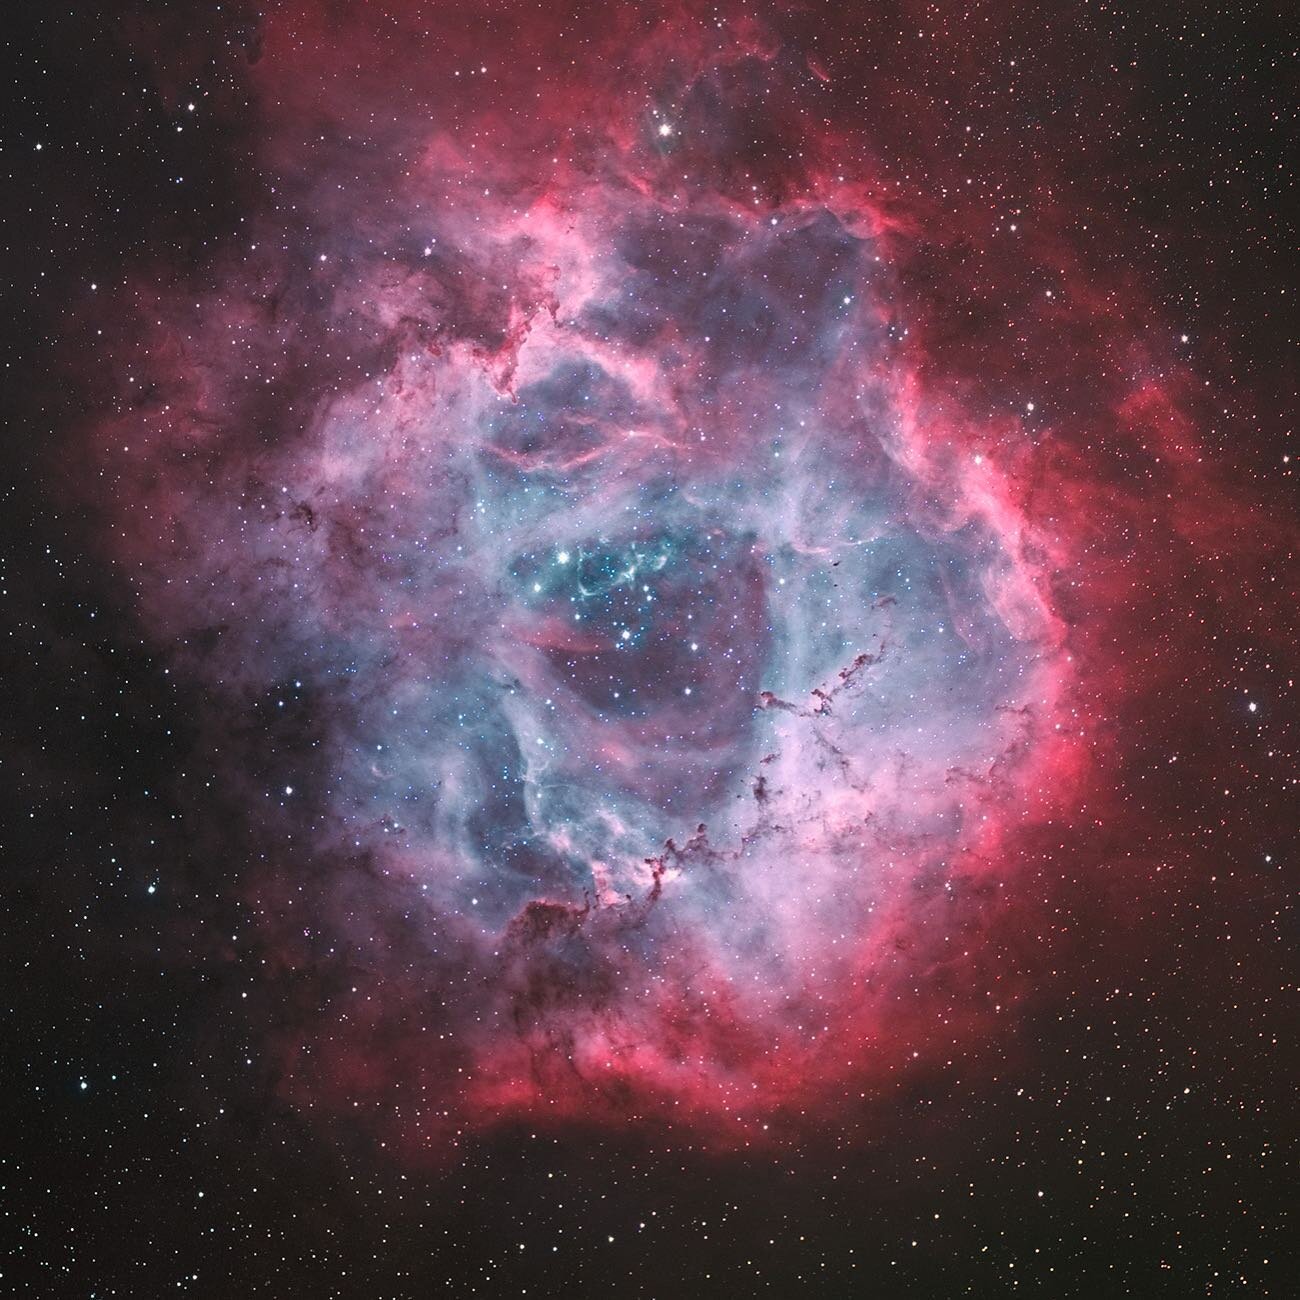
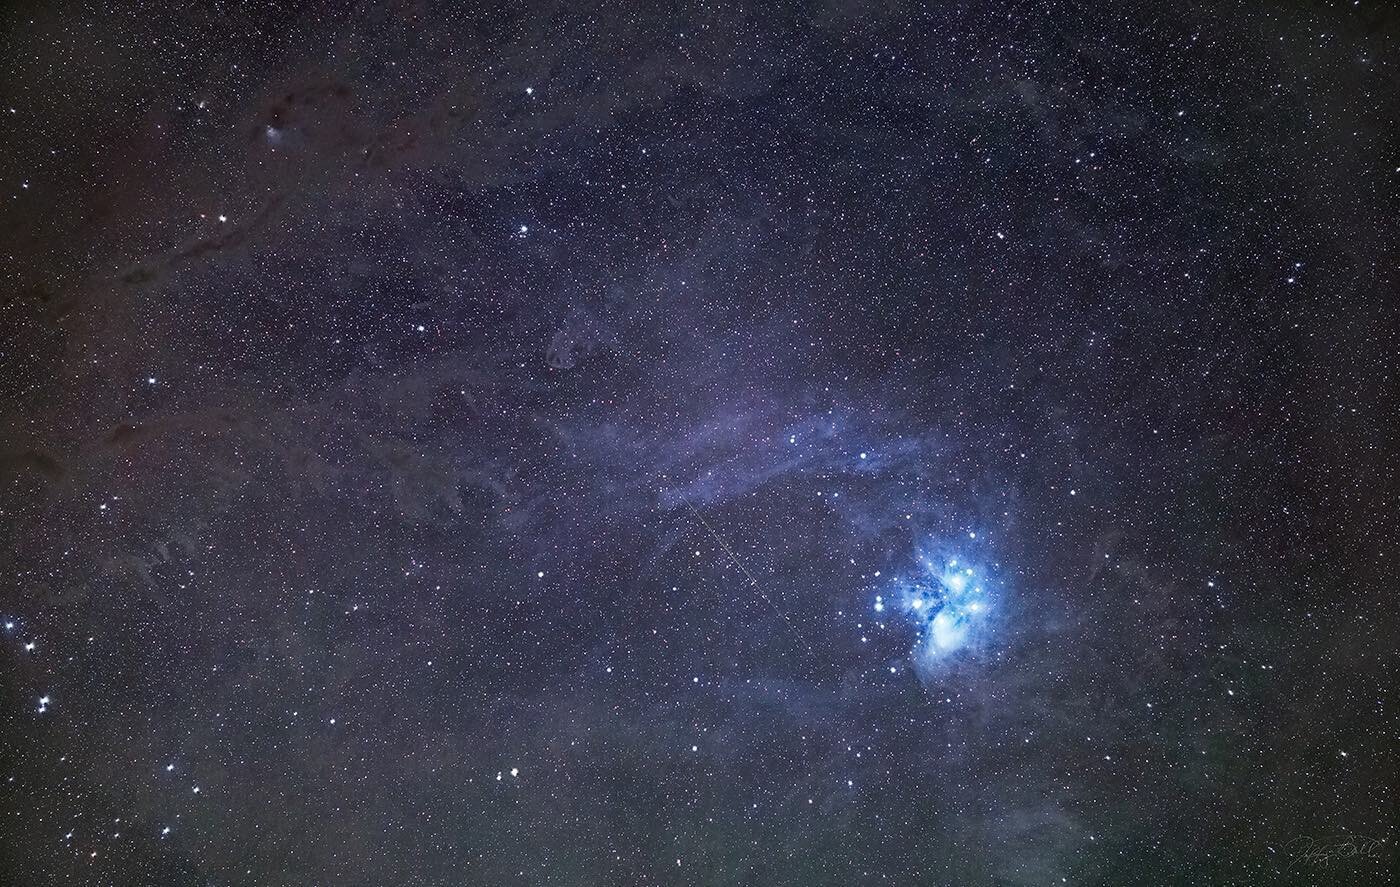
Angels in Monoceros: The Monoceros M2 Complex
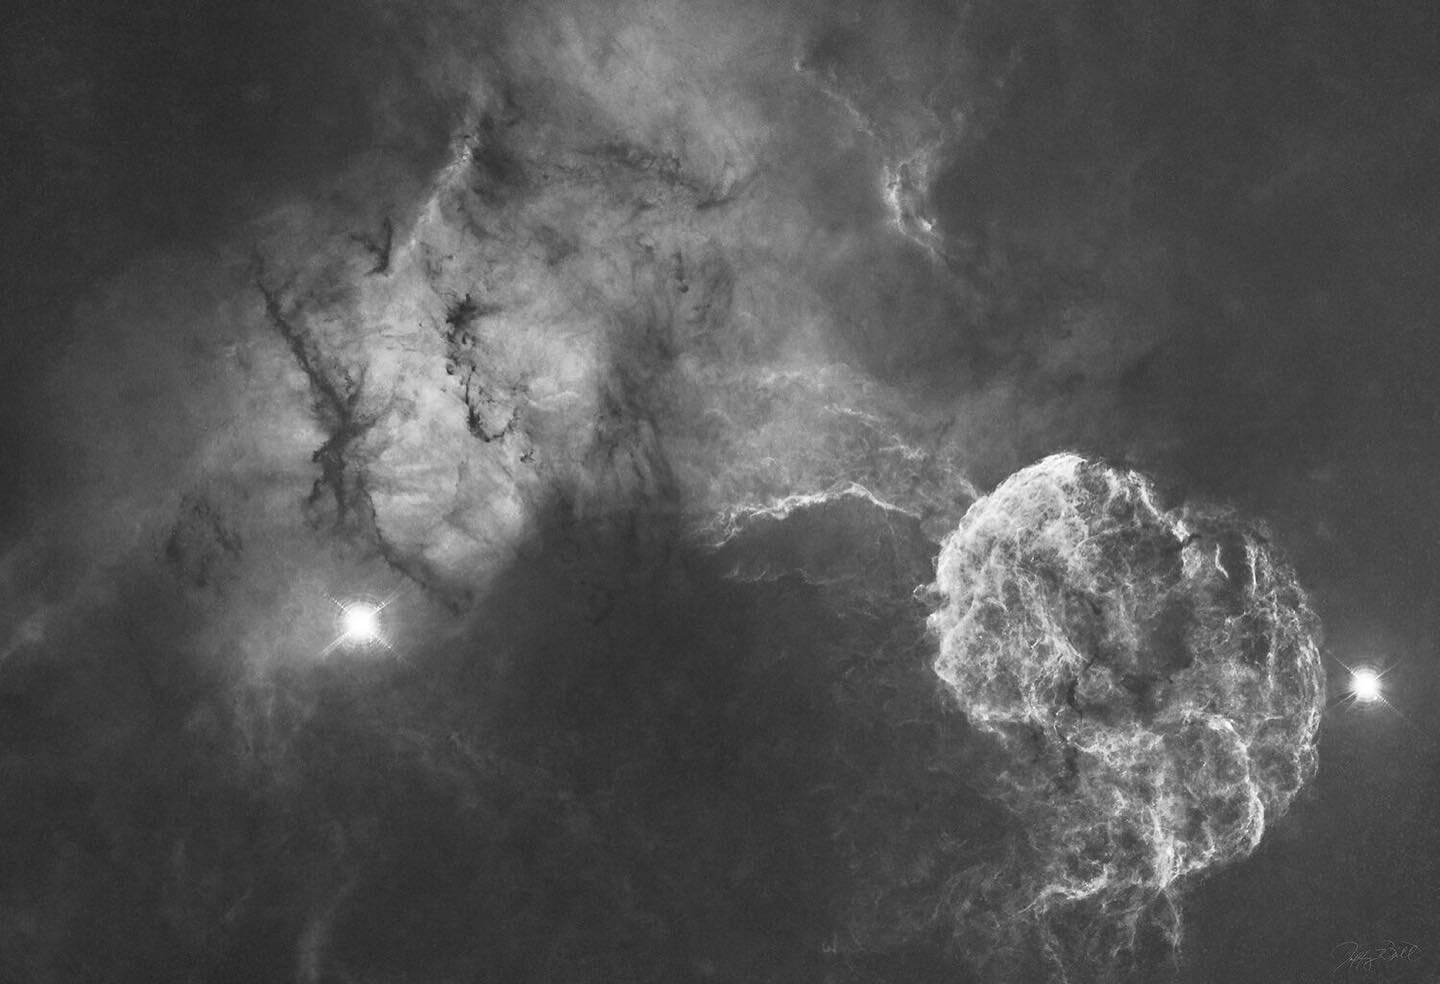
The Monoceros R2 molecular complex (often shortened to Mon R2) is a massive giant molecular cloud and one of the nearest active star-forming regions to Earth. It's a dynamic stellar nursery embedded in dense gas and dust, where new stars—particularly massive ones—are actively being born.
Key Facts
Location: Southwestern part of the constellation Monoceros (the Unicorn), near the border with Orion. It's part of the larger Orion-Monoceros cloud complex.
Distance: Approximately 2,400–2,700 light-years (around 830 parsecs).
Size and Structure: The main dense core is relatively compact (a few light-years across), but the overall molecular cloud and associated nebulae span a wide area—reflection nebulae alone stretch up to about 2° in the sky. It's situated well below the galactic plane, which makes it stand out in certain observations.
Age and Activity: Star formation here began roughly 6–10 million years ago. It hosts an OB association (young, hot, massive B- and A-type stars) that illuminates surrounding dust, creating prominent reflection nebulae with bluish hues. There's also significant emission from ionized gas (red glows) and dark nebulae that appear as shadowy silhouettes blocking background light.
Notable Features:
A central hub of massive star formation with embedded clusters, molecular outflows, and HII regions.
Infrared observations (like those from VISTA or 2MASS) penetrate the dust to reveal hidden young stars and protoplanetary disks.
It's a key site for studying early stellar evolution, variability in young stellar objects (YSOs), and the interplay between massive stars and their natal clouds.
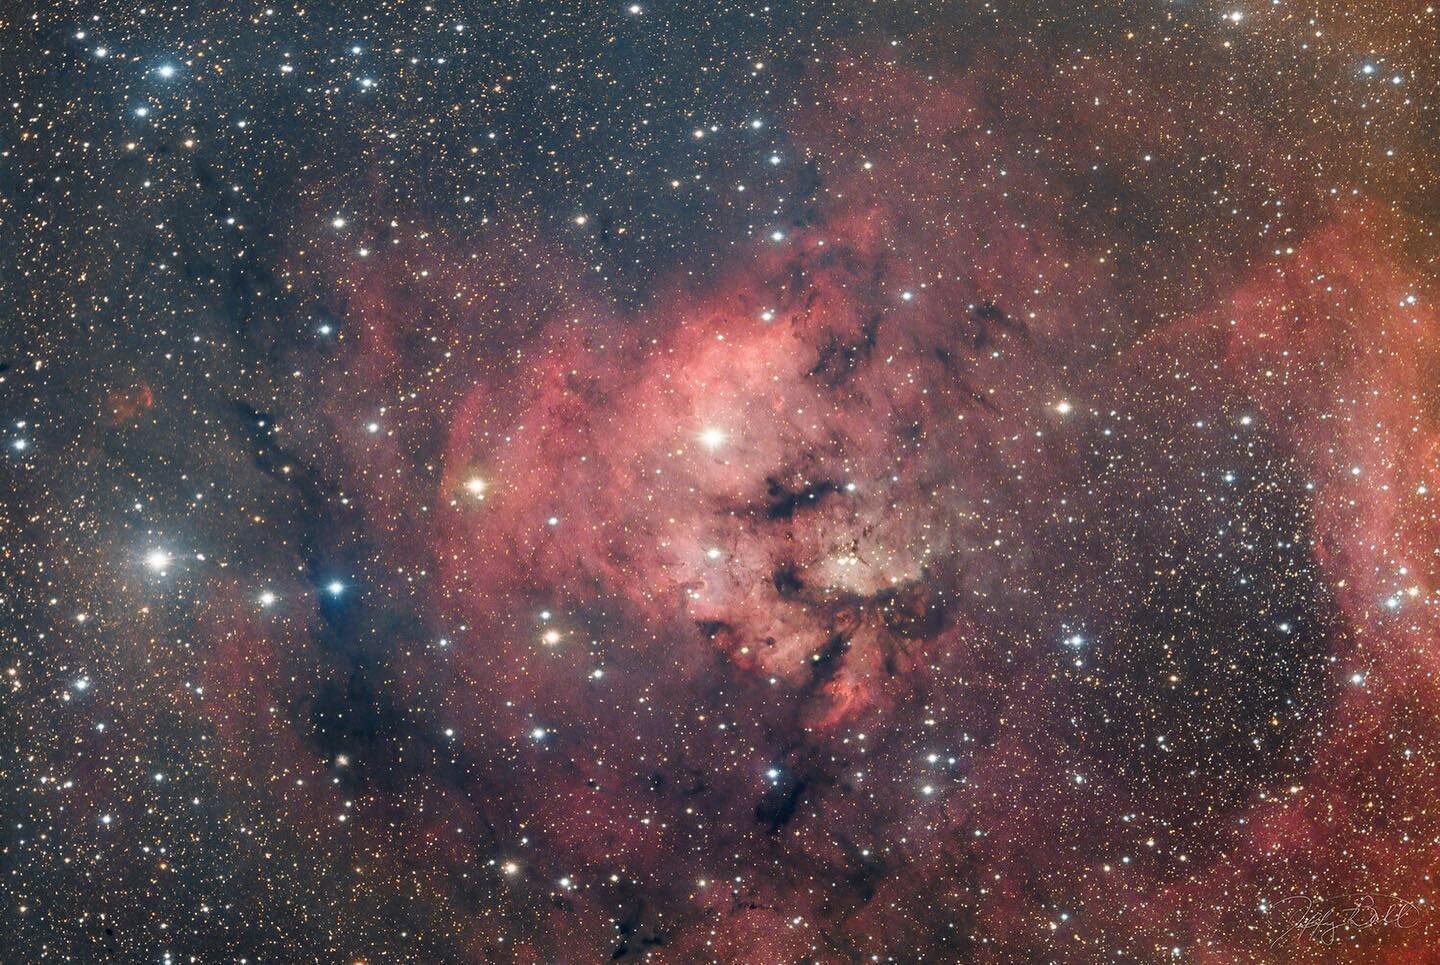
The most famous and photogenic part of Mon R2 is the region around NGC 2170 (the Angel Nebula), a striking reflection nebula with wing-like dust structures, glowing blue from scattered starlight, mixed with red emission and dark lanes. Wider views of the complex reveal a richer tapestry of colorful gas, dust filaments, and star clusters.
Credit: GROK 2/28/26
Click on image for larger view.
New Astro Camera: OM-3
Join me for a LIVE conversation about this new astro camera coming to the market. Is this the best option for you? How does it compare to other options? https://www.earthandskyphoto.com Correction: when discussing Bulb mode with Canon, I incorrectly said it had a limit of 30”. I meant to say manual exposure has a max of 30”. In bulb, you need to use a remote control or app for exposure time control. The problem is you can’t set exposure time for stills in the camera menu. I was made aware that Olympus no longer owns the OM system. It is owned by Japanese industrial Partners, a private equity firm. For content on the OM-3 for astrophotography, please see Ben Chapell’s Narrow Band channel. https://youtube.com/@TheNarrowbandChannel?si=GcWY-BM9skG9LPhY
Jeff's Blog
Join me on photography journeys from desert landscapes to deep sky wonders.