Astrophotography

December Print of the Month: Scorpius

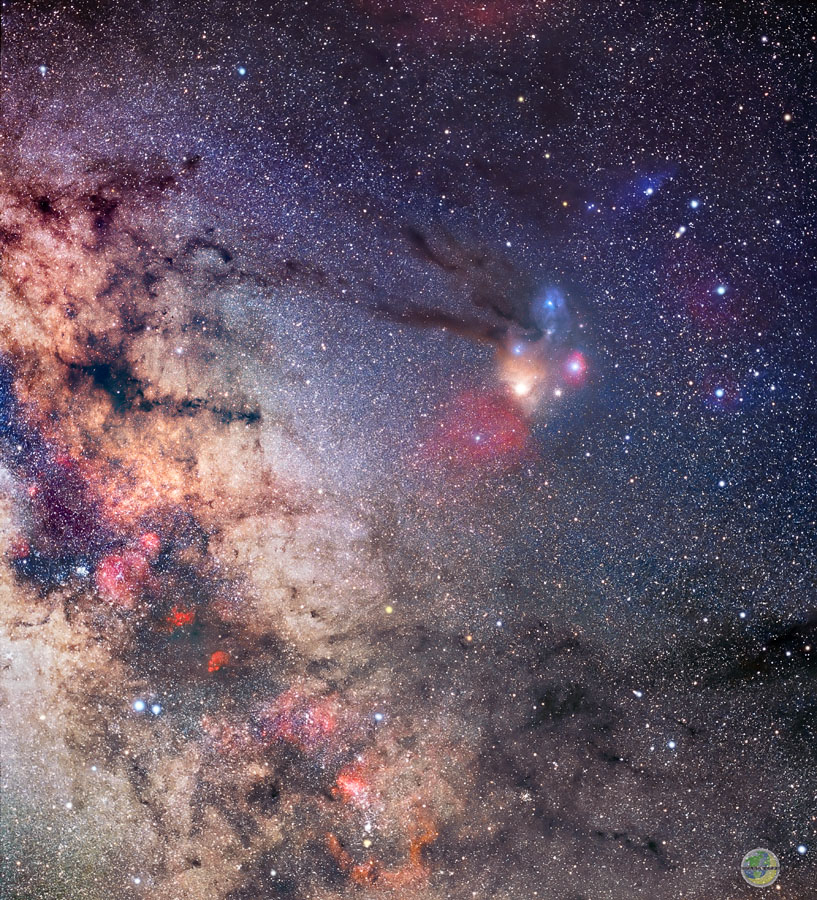
ScorpiusI just love revisiting images, especially those from the film days.  This particular image has always been special to me.  It was taken while on an astronomy photography safari at New Mexico Skies near Cloudcroft, NM.  

We had a large group of astrophotographers and it was a highlight of my photography life.  The trip was in May 2003 and film was still a major player in photographic capture.  I particularly loved, and still do, the results with my Pentax 6x7 and medium format Provia transparency film.  This image was taken with a 55mm lens and presents the entire constellation of Scorpius.  It is simply the most colorful region of our Milky Way galaxy.  

The field of view is just barely clear of our horizon, but we had excellent transparency on this night that permitted the capture of nearly the entire Scorpius region.  There are some areas of this image that contain data from other imaging instruments at higher focal lengths to provide a bit more definition to the area.  All of the blending data is film with the exception of one very small area which is an early digital capture with a Canon 350D.  

The image is the December Print of the Month.  It is printed on Hahnemuhle Photo Rag paper and matted on black mat with black and silver framing.  All glass is museum glass.  I hope you enjoy the image and next time you are out under a dark sky in the summer look up and see Scorpius with a different perspective.  

Please don't forget to click on the image (or here December Print of the Month) and then on the next thumbnail to see the image in the best presentation and full size in the black portfolio window.  

Mat / Frame Size (print size)


Comet Hartley 2 visits our neighborhood

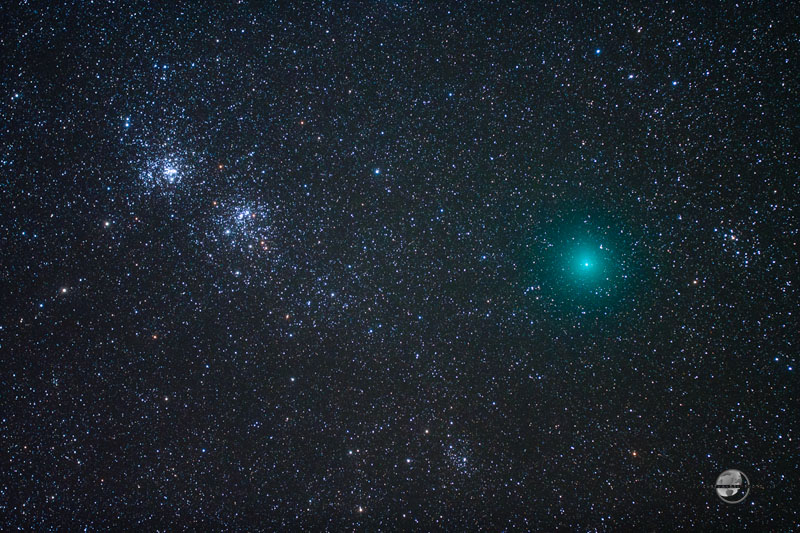
Comet Hartley and the Double ClusterThis image was taken from Spruce Knob in the highlands of West Virginia on October 9 at 1:00 a.m.  The image shows the green glow of Comet Hartley 2 as it graces our neighborhood of the solar system on its latest journey to the sun.  Also in the picture is the deep sky object known as the Double Cluster.  The cluster is made up of two distinct open clusters of stars and are also know as NGC 869 and 884.  The comet was visited by the EPOXI Mission spacecraft on November 4 and the amazing images from that visit are featured on this APOD page.  The comet's closest approach to Earth was 11 million miles on October 28 and will visit our neighborhood again in April 2017.  

Andromeda Galaxy 2010

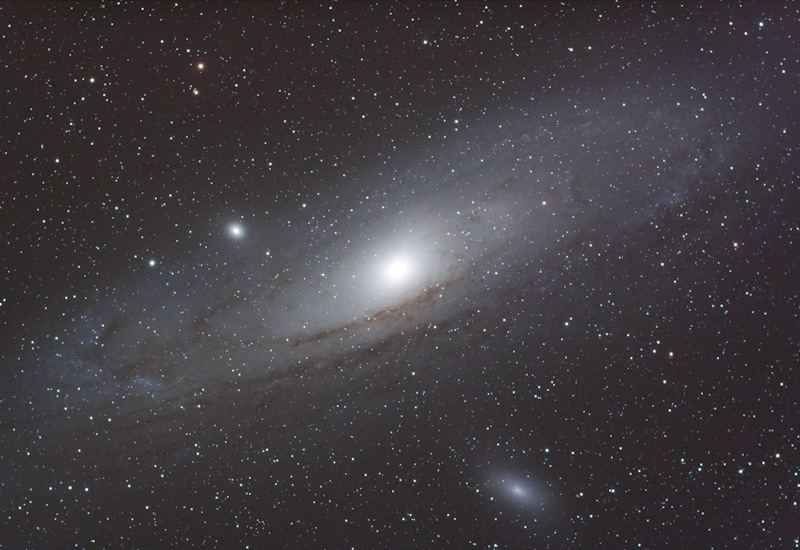
The Great Andromeda GalaxyIf you have followed previous blog posts you know that I have been working on this image for some time.  I apologize that I did not provide more intermediate updates, but here is the final image as it will be printed on my Epson 7800.  You may want to reference earlier posts about making a print of Andromeda beginning on September 15.  You can see the initial RAW image at initial capture and compare to the finished image.  As Ansel said, "you don't take a photograph, you MAKE a photograph."

It is always a pleasure to revisit familiar astronomical objects and the Great Andromeda Galaxy is certainly one of the finest.  This past August we had the opportunity to capture the galaxy from the fabulous dark skies of The Mountain Institute on Spruce Knob in West Virginia during the Almost Heaven Star Party.  The galaxy is a marvel to behold as one of our local neighborhood galaxies that stretches over 220,000 light years across.  It is the farthest deep sky object that can be seen with the unaided eye and is located at a distance of over 2,000,000 light years away.  The galaxy is easily seen from the dark skies of Spruce Knob with the unaided eye.  The diffuse glow of the galaxy is caused by billions of stars shining throughout the galaxy's disk.  Andromeda is classified as a spiral type of galaxy.  For more information and to view the image in the black portfolio screen (the best view) please click here.    

Creating a Print: Part 2

M31 RAW converted and ready for stacking

Several corrections are made in Adobe Light Room 3.0 (LR) with the image.  First the image is rotated to a more pleasing angle of view.  This is the presentation angle in which I originally envisioned the galaxy before capture.  One of the most important things we do in LR is attempt to get the color balance as accurate as possible.  It is important that all sharpening be turned "off" in LR.  Sharpening can cause distortion and artifacts in the stars.  I then apply an appropriate amount of noise reduction.  This is where LR 3.0 really stands out.  The new luminance and color noise reduction controls are outstanding for astrophotography.  It is important to not over-smooth as we want normal luminance noise to be reduced by subsequent stacking of photos.  Now that I have my RAW file ready for conversion, I simply apply the same corrections to the other RAW files and prepare them for stacking.  

Light Room 3.0 for Astronomical Images

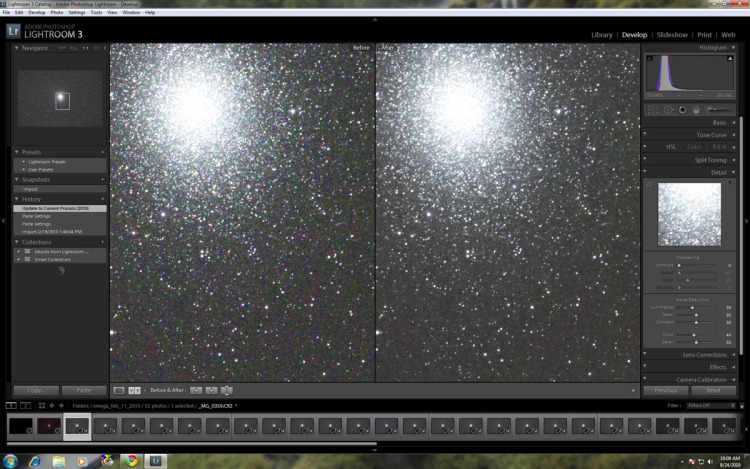
I recently upgraded to LR 3.0 and had an opportunity to work up an Omega Centauri Globular Cluster image.  One of the upgraded features in LR 3.0 is an enhanced noise reduction tool.  The new noise reduction seems to have smarter power.  Meaning that is applies a stronger smoothing effect to the image while still preserving detail.  Now remember some of these astronomical images contain the worst noise you can imagine.  The particular screen shot here is of a 1 minute exposure at ISO 6400.  I couldn't even take this photograph one year ago at those settings.  So technology and software have come a long way in noise reduction.  The screen is a split screen image.  The image on the left is before noise reduction and the image on the right is after noise reduction has been applied.  

The settings I use in this screen shot are for demonstration purposes.  You can clearly see the benefit is strongest in color noise reduction.  While there is still some color mottling, it is reduced greatly and the high value color noise levels are reduced dramatically.  The ISO 6400 images were used to capture the extension of the globular cluster and ultimately a lower ISO image was used for the stars and background sky.  But it is very encouraging to see such a noise reduction capability with ISO 6400.  I tend to not apply too much luminosity reduction as the image will realize a noise reduction through stacking of multiple images.  But the color noise reduction is one that really helps smooth the background sky and when stacked leads to a very clean and neutral sky background.  

Once again, when it comes to utilizing a DSLR for astronomical imaging things are only getting better.  

To learn more about image processing please see my "Learn Digital Photography" menu item above for customized education in Light Room or Photoshop.